


This is a three part series.
In this article, I'll walk you through one way that you can take your site and host it on your own server.
Step 1: Linux server or a VM.
You'll need shell access to your server/VM. I would recommend micro instance in Google Cloud and if you are new you can almost get $300 in Google Cloud Credits. Also, check out their free tier. You can also use a t2.micro instance in AWS, they offer free tier too. In this guide I will show how you can get a free linux instance:
You will get $300 credit to play around with for a year! It is more than enough to learn and play with everything Google Cloud offers. (⚠ You will need to provide a credit card even if registering for free tier)
Step 1: Create a new project:
After creating your account, create a new project where you will launch your resources, in our case, its a VM instance.

Step 2: Create a VM instance:
After the project is created, click on the little hamburger on the top left side, and go down to Compute Engine and select VM instances

Click on create an instance.
After that, please choose the following settings for your VM:

If you scroll down, you will see the Firewall settings for your instance, check on both:
- Allow HTTP
- Allow HTTPS

Then click create!
Step 3: Connect to the VM instance:
Wait for the instance to launch.
Once the instance has launched click on the SSH button and it should open a new tab with shell access to your Linux instance.
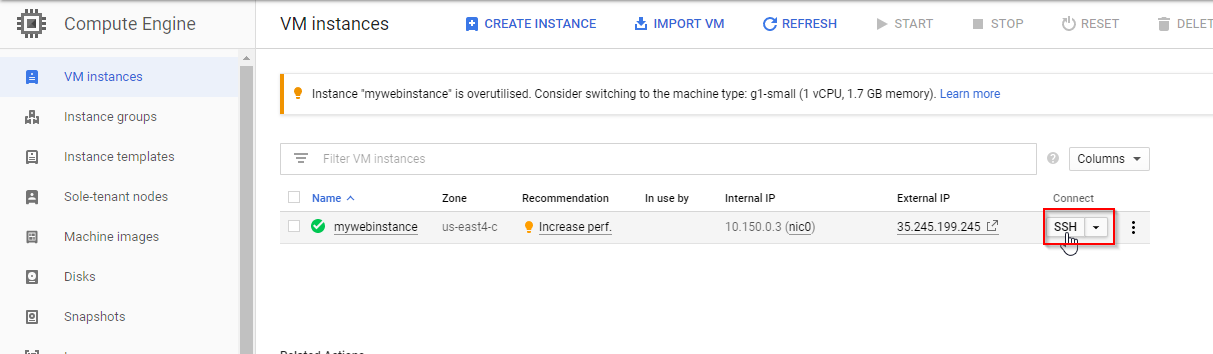
You will also notice there is a public IP address assigned to your instance, take note of it, as this is where we will point our domain for our website.
Other cloud providers:
Please hit the 🖤 if it was helpful!